
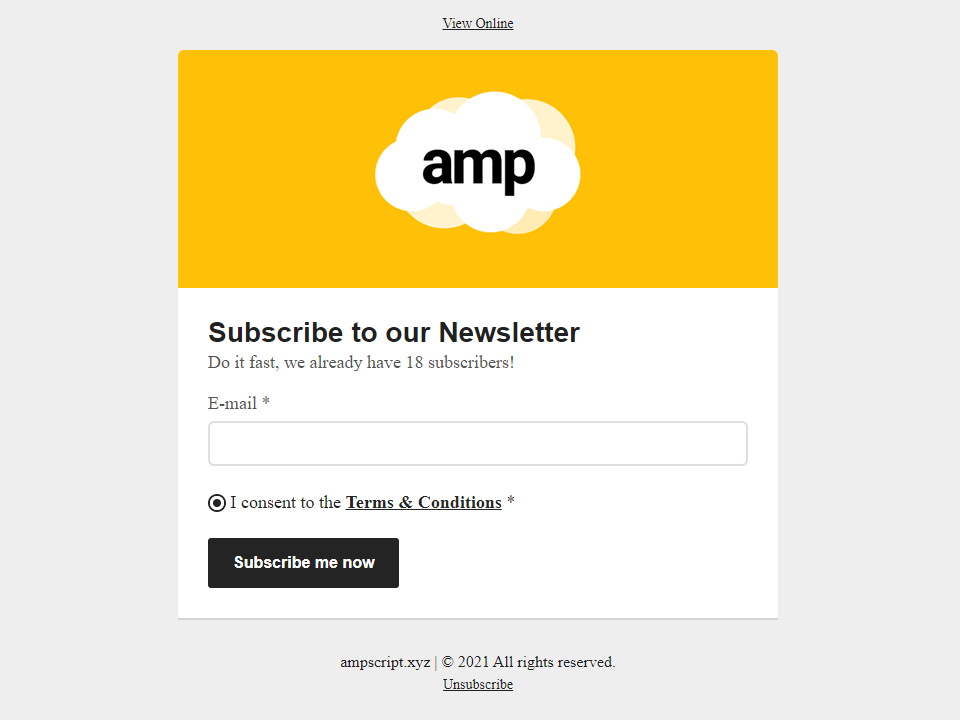
This article explains how to create AMP for Email forms in Salesforce Marketing Cloud email communications.
Use case
Nowadays, web forms are the most common way to capture new leads and perform new subscriptions to various communications.
The customers are usually redirected to these forms from a link in an email, an SMS message or some social media channel.
But what if we could cut the middle man? What if we could fill out the form directly in the communication itself?
That’s the idea behind AMP for Email framework and as of late, it has been introduced in Salesforce Marketing Cloud!
Why use it? Because it’s the perfect way to increase the customer engagement and the overall user experience.
Before we start
In order to capture and process the data sent from the AMP form, we’ll need to create the following:
- A Data Extension to capture the data.
- A Cloud page to process the requests.
- An HTML email to fallback to in case of errors of incompatibility.
For the Data Extension, let’s call it Subscriptions and define the following structure:
| Id | Text | 50 | Primary Key |
| EmailAddress | EmailAddress | 254 | Nullable |
| Consent | Text | 50 | Nullable |
| CreatedDate | Date | 254 | Nullable |
As for the Cloud page, we are going to refer to it later in the code as the following URL: https://marketingclouddomain.com/endpoint
Create the email
Let’s begin by creating our first AMP email! Keep in mind, that this article doesn’t cover the build of the fallback HTML email, but please feel free to create one on your own, or implement a dummy content for testing purposes.
Building the template
In order to create a proper Marketing Cloud AMP email, we need to use the AMP4Email boiletplate with the following platform-specific elements:
- Guide Template Language (GTL) delimiter modification tag.
- Unsubsciption and view in browser tags.
- Custom tracking tag.
In addition, in order for our form to work, we need to load the following components:
Here is what it should look like:
<!-- {{={< >}=}} -->
<!DOCTYPE html>
<html amp4email data-css-strict>
<head>
<meta charset="utf-8">
	<script async src="https://cdn.ampproject.org/v0.js"></script>
	<script async custom-element="amp-selector" src="https://cdn.ampproject.org/v0/amp-selector-0.1.js"></script>
	<script async custom-element="amp-form" src="https://cdn.ampproject.org/v0/amp-form-0.1.js"></script>
	<script async custom-element="amp-bind" src="https://cdn.ampproject.org/v0/amp-bind-0.1.js"></script>
	<script async custom-element="amp-list" src="https://cdn.ampproject.org/v0/amp-list-0.1.js"></script>
	<script async custom-template="amp-mustache" src="https://cdn.ampproject.org/v0/amp-mustache-0.2.js"></script>
	<style amp4email-boilerplate>body{visibility:hidden}</style>
	<style amp-custom></style>
</head>
<body>
	<!-- %%view_email_url%% -->
	<!-- %%unsub_center_url%% -->
	<custom name="opencounter" type="tracking">
</body>
</html>
Creating the dynamic form
Creating the form will require the knowledge of HTML, JavaScript syntax and a basic understanding of Mustache templates.
Here is how it works:
- When the form is filled out and submitted, a native form validation is performed.
- In case of errors, the validation error messages appear.
- In case of success, a Fetch API post request (or XHR for fallback) is sent to a Marketing Cloud page.
- When the Marketing Cloud page is rendered, the form parses the content of the page in a JSON format.
- If the request is successful and the JSON confirms that all the actions have been performed in Marketing Cloud, a success message is displayed. Otherwise, the customer sees an error message.
<form
    method="post"
    action-xhr="https://marketingclouddomain.com/endpoint"
    custom-validation-reporting="show-all-on-submit"
    on="submit-success: AMP.setState({'status': event.response.status, 'submitting': false}),
    paragraph.refresh; submit: AMP.setState({'submitting': true}); submit-error: AMP.setState({'status': event.response.status, 'submitting': false})"
>
    <div class="form-content">
        <div class="form-group">
            <label for="EmailAddress">E-mail *</label>
            <input
                id="EmailAddress"
                name="EmailAddress"
                type="text"
                pattern="^([a-zA-Z0-9_\-\.]+)@([a-zA-Z0-9_\-\.]+)\.([a-zA-Z]{2,})$"
                required
            >
            <span class="input-error" visible-when-invalid="valueMissing" validation-for="EmailAddress">
                Please fill out this field.
            </span>
            <span class="input-error" visible-when-invalid="patternMismatch" validation-for="EmailAddress">
                Please enter a valid email address.
            </span>
        </div>
        <br>
        <input
            id="Consent"
            name="Consent"
            type="text"
            tabIndex=-1
            aria-hidden=true
            style="display:none;"
            [value]="selectedItem"
            required
        >
        <amp-selector
            on="select:AMP.setState({selectedItem: event.targetOption})"
            layout="container"
        >
            <div option="OPTIN">
                <span><i></i></span> I consent to the <a href="https://ampscript.xyz/privacy-policy/" style="color:#242424;font-weight:bold;" target="_blank">Terms & Conditions</a> *
            </div>
        </amp-selector>
        <span
            class="input-error"
            visible-when-invalid="valueMissing"
            validation-for="Consent"
        >
            Please accept our terms.
        </span>
        <br>
        <button [text]="(submitting == true) ? 'Please wait…' : 'Subscribe me now'">
            Subscribe me now
        </button>
    </div>
    <div submit-success>
        <p
            [class]="(status != 'OK') ? 'submit-error' : 'submit-success' "
            [text]="(status != 'OK') ? 'Errors occured. Please try again later' : 'Thank you! You are now subscribed.'">
            Thank you! You are now subscribed.
        </p>
    </div>
    <div submit-error>
        <p>Subscription failed!</p>
    </div>
</form>
In order to make the form even more dynamic, we can use amp-bind component to hide or show different elements according to what happens in the form.
This component can attach actions to almost any HTML element, such us on="submit: [...]" on a form tag, which is performed when the form is submitted, or on="tap: [...]" on any element that detects clicks.
Usually, the “on” method is combined with the AMP.setState() function, that controls the “state” variables. The values of these variables can be modified at any time and are extremely useful to interact with the HTML elements.
For exemple, in the code above, the “on” attribute on the form tag performs the following actions:
- Upon successful form submission, put the value of the JSON response in a “status” variable :
submit-success: AMP.setState({'status': event.response.status}). This will display the correct submission message:[text]="(status != 'OK') ? 'Errors occured. Please try again later' : 'Thank you! You are now subscribed.'". - At the same time, switch the live variable “submitting” to false:
submit-success: AMP.setState({'status': event.response.status, 'submitting': false}). This variable defines which content is displayed in the submit button later in the code:[text]="(submitting == true) ? 'Please wait…' : 'Subscribe me now'".
Performing a live retrieve
The form sends the data to a Cloud page, but what if we wanted to retrieve some data instead of sending it?
This is when the amp-list component comes into play. It performs the retrieve request automatically when the email is opened and can be refreshed at any time by referencing the name of the id attribute of the component and invoking a refresh function.
<amp-list
	id="paragraph"
	src="https://marketingclouddomain.com/endpoint"
>
	<div placeholder>Loading...</div>
	<div fallback>Do it fast, we already have some subscribers!</div>
	<template type="amp-mustache">
		Do it fast, we already have {{ num }} subscribers!
	</template>
</amp-list>
In the exemple above, we retrieve and display the number of subscribers. This action is performed when the email is opened and when the subscription form is submitted: paragraph.refresh; in the code below.
<form
    [...]
    on="submit-success: AMP.setState({'status': event.response.status, 'submitting': false}),
    paragraph.refresh; submit: AMP.setState({'submitting': true}); submit-error: AMP.setState({'status': event.response.status, 'submitting': false})"
>
	[...]
Adding the styling
Building the styling for AMP emails is a pure pleasure, considering that it supports a large number of modern CSS properties.
These styles should be pasted in the amp-custom style tag in the head of our email.
form.amp-form-submit-success .form-content {
    display: none;
}

form [submit-success],
form [submit-error],
form .submit-success,
form .submit-error {
    color: white;
    border-radius: 3px;
    margin: 0;
    padding: 10px 20px;
}

form [submit-success],
form .submit-success {
    background: green;
}

form [submit-error],
form .submit-error {
    background: red;
}

form button {
    outline:none;
    font-size: 16px;
    line-height: 20px;
    font-weight: bold;
    font-family: sans-serif;
    color: #ffffff;
    background-color: #242424;
    border-color: #242424;
    border-style: none;
    border-width: 1px;
    border-radius: 3px;
    padding-left: 25px;
    padding-right: 25px;
    padding-top: 15px;
    padding-bottom: 15px;
}

form .form-group {
    position: relative;
}

form .form-group label {
    display: block;
    font-size: 18px;
    font-weight: normal;
    padding-bottom: 6px;
    color: #535353;
}

form .form-group input {
    display: block;
    background: none;
    font-family: sans-serif;
    font-size: 18px;
    width: 100%;
    box-shadow: none;
    color: #535353;
    border-style: solid;
    border-color: #dfdfdf;
    border-width: 2px;
    border-radius: 6px;
    padding-left: 10px;
    padding-right: 10px;
    padding-top: 10px;
    padding-bottom: 10px;
    box-sizing: border-box;
}

form .form-group input.user-invalid {
    border-color: red;
}

form .form-group input.user-valid {
    border-color: green;
}

form .form-group input:hover,
form .form-group input:focus {
    outline: none;
    border-color: #242424;
}

form amp-selector [option] > span {
    border-radius: 25px;
    background: white;
    display: inline-block;
    vertical-align: text-bottom;
    text-align: center;
    font-weight: bold;
    border: 2px solid #dfdfdf;
}

form amp-selector [option] > span i {
    display: block;
    width: 8px;
    height: 8px;
    border: 3px solid #FFFFFF;
    background: #FFFFFF;
    border-radius: 25px;
}

form amp-selector [option][selected] > span {
    border: 2px solid #242424;
}

form amp-selector [option][selected] > span i {
    border: 3px solid #FFFFFF;
    background: #242424;
}

form amp-selector [option]:focus,
form amp-selector [option][selected] {
    outline: none;
}
Full code
Let’s have a look at the full code. Please note that this is just a bare-bones exemple.
<!-- {{={< >}=}} -->
<!DOCTYPE html>
<html amp4email data-css-strict>
<head>
<meta charset="utf-8">
	<script async src="https://cdn.ampproject.org/v0.js"></script>
	<script async custom-element="amp-selector" src="https://cdn.ampproject.org/v0/amp-selector-0.1.js"></script>
	<script async custom-element="amp-form" src="https://cdn.ampproject.org/v0/amp-form-0.1.js"></script>
	<script async custom-element="amp-bind" src="https://cdn.ampproject.org/v0/amp-bind-0.1.js"></script>
	<script async custom-element="amp-list" src="https://cdn.ampproject.org/v0/amp-list-0.1.js"></script>
	<script async custom-template="amp-mustache" src="https://cdn.ampproject.org/v0/amp-mustache-0.2.js"></script>
	<style amp4email-boilerplate>body{visibility:hidden}</style>
	<style amp-custom>
        form.amp-form-submit-success .form-content,
        form.amp-form-submit-error .form-content {
            display: none;
        }

        form [submit-success],
        form [submit-error],
        form .submit-success,
        form .submit-error {
            color: white;
            border-radius: 3px;
            margin: 0;
            padding: 10px 20px;
        }

        form [submit-success],
        form .submit-success {
            background: green;
        }

        form [submit-error],
        form .submit-error {
            background: red;
        }

        form button {
            outline:none;
            font-size: 16px;
            line-height: 20px;
            font-weight: bold;
            font-family: sans-serif;
            color: #ffffff;
            background-color: #242424;
            border-color: #242424;
            border-style: none;
            border-width: 1px;
            border-radius: 3px;
            padding-left: 25px;
            padding-right: 25px;
            padding-top: 15px;
            padding-bottom: 15px;
        }

        form .form-group {
            position: relative;
        }

        form .form-group label {
            display: block;
            font-size: 18px;
            font-weight: normal;
            padding-bottom: 6px;
            color: #535353;
        }

        form .form-group input {
            display: block;
            background: none;
            font-family: sans-serif;
            font-size: 18px;
            width: 100%;
            box-shadow: none;
            color: #535353;
            border-style: solid;
            border-color: #dfdfdf;
            border-width: 2px;
            border-radius: 6px;
            padding-left: 10px;
            padding-right: 10px;
            padding-top: 10px;
            padding-bottom: 10px;
            box-sizing: border-box;
        }

        form .form-group input.user-invalid {
            border-color: red;
        }

        form .form-group input.user-valid {
            border-color: green;
        }

        form .form-group input:hover,
        form .form-group input:focus {
            outline: none;
            border-color: #242424;
        }

        form amp-selector [option] > span {
            border-radius: 25px;
            background: white;
            display: inline-block;
            vertical-align: text-bottom;
            text-align: center;
            font-weight: bold;
            border: 2px solid #dfdfdf;
        }

        form amp-selector [option] > span i {
            display: block;
            width: 8px;
            height: 8px;
            border: 3px solid #FFFFFF;
            background: #FFFFFF;
            border-radius: 25px;
        }

        form amp-selector [option][selected] > span {
            border: 2px solid #242424;
        }

        form amp-selector [option][selected] > span i {
            border: 3px solid #FFFFFF;
            background: #242424;
        }

        form amp-selector [option]:focus,
        form amp-selector [option][selected] {
            outline: none;
        }
    </style>
</head>
<body>
  	<h1>
    	Subscribe to our Newsletter
  	</h1>
  	<h3>
        <amp-list
            id="paragraph"
            src="https://marketingclouddomain.com/endpoint"
        >
            <div placeholder>Loading...</div>
            <div fallback>Do it fast, we already have some subscribers!</div>
            <template type="amp-mustache">
                Do it fast, we already have {{ num }} subscribers!
            </template>
        </amp-list>
    </h3>
    <form
        method="post"
        action-xhr="https://marketingclouddomain.com/endpoint"
        custom-validation-reporting="show-all-on-submit"
        on="submit-success: AMP.setState({'status': event.response.status, 'submitting': false}),
        paragraph.refresh; submit: AMP.setState({'submitting': true}); submit-error: AMP.setState({'status': event.response.status, 'submitting': false})"
    >
        <div class="form-content">
            <div class="form-group">
                <label for="EmailAddress">E-mail *</label>
                <input
                    id="EmailAddress"
                    name="EmailAddress"
                    type="text"
                    pattern="^([a-zA-Z0-9_\-\.]+)@([a-zA-Z0-9_\-\.]+)\.([a-zA-Z]{2,})$"
                    required
                >
                <span class="input-error" visible-when-invalid="valueMissing" validation-for="EmailAddress">
                    Please fill out this field.
                </span>
                <span class="input-error" visible-when-invalid="patternMismatch" validation-for="EmailAddress">
                    Please enter a valid email address.
                </span>
            </div>
            <br>
            <input
                id="Consent"
                name="Consent"
                type="text"
                tabIndex=-1
                aria-hidden=true
                style="display:none;"
                [value]="selectedItem"
                required
            >
            <amp-selector
                on="select:AMP.setState({selectedItem: event.targetOption})"
                layout="container"
            >
                <div option="OPTIN">
                    <span><i></i></span> I consent to the <a href="https://ampscript.xyz/privacy-policy/" style="color:#242424;font-weight:bold;" target="_blank">Terms & Conditions</a> *
                </div>
            </amp-selector>
            <span
                class="input-error"
                visible-when-invalid="valueMissing"
                validation-for="Consent"
            >
                Please accept our terms.
            </span>
            <br>
            <button [text]="(submitting == true) ? 'Please wait…' : 'Subscribe me now'">
                Subscribe me now
            </button>
        </div>
        <div submit-success>
            <p
                [class]="(status != 'OK') ? 'submit-error' : 'submit-success' "
                [text]="(status != 'OK') ? 'Errors occured. Please try again later' : 'Thank you! You are now subscribed.'">
                Thank you! You are now subscribed.
            </p>
        </div>
        <div submit-error>
            <p>Subscription failed!</p>
        </div>
    </form>
  	<!-- %%view_email_url%% -->
	<!-- %%unsub_center_url%% -->
	<custom name="opencounter" type="tracking">
</body>
</html>
Create the Form Handler
Now that our email is ready, let’s see how to build a Marketing Cloud page to process the data sent from the AMP form.
How it works
At first, even before we start processing the data, we need to perform a security check on the origin of the email and insert the required security headers, in compliance with the CORS policy of AMP for Email.
Note: Please update your stack number to be able to test your AMP email from the preview tab. https://user-content.s10.sfmc-content.com is only valid for Stack 10.
var allowedOrigin = [
	"https://playground.amp.dev",
	"https://amp.gmail.dev",
	"https://mail.google.com",
	"https://user-content.s10.sfmc-content.com"
];

var sender = Platform.Request.GetRequestHeader("AMP-Email-Sender");
var origin = Platform.Request.GetRequestHeader("Origin");
var source = Platform.Request.GetQueryStringParameter("__amp_source_origin");

if(origin == null || origin.length === 0) origin = referer;

// Origin doesn't work in FF, in IE11 Origin is the full URL (not only domain)

var regex = /^(?:\/\/|[^\/]+)*/g;
var match = origin.match(regex);
var origin = (match.length > 0) ? match[0] : null;

try {

	if(!!inArray(allowedOrigin, origin)) {
		HTTPHeader.SetValue("Access-Control-Allow-Methods", "POST");
		HTTPHeader.SetValue("Access-Control-Allow-Origin", origin);
		HTTPHeader.SetValue("Content-Type", "application/json");
		if(source != null) {
			HTTPHeader.SetValue("Access-Control-Expose-Headers", "AMP-Redirect-To, AMP-Access-Control-Allow-Source-Origin");
			HTTPHeader.SetValue("AMP-Access-Control-Allow-Source-Origin", source);
		}
		HTTPHeader.SetValue("Access-Control-Allow-Credentials", "true");
	} else {
		throw "Origin not allowed";
	}

[...]
Then, we’ll need to make a distinction between 2 possible request methods: POST (sending data) or GET (asking for data).
if(Platform.Request.Method == "POST") {
	[...]
} else {
	[...]
}
If the request method is “sending data” (or “POST“), we capture the data, process it and create a record in a Data Extension. Otherwise, we retrieve some records from the Data Extension according to a predefined filter and return the number of records that were retrieved.
Please note that unfortunately, AMP for Email is incapable of sending data using the application/json content type! Therefore, we need to pre-process that data with the following function:
function parsePostJSON() {

	var o = {};
	var post = String(Platform.Request.GetPostData());
	var pairs = post.split("&");

	for(var i in pairs) {

		var pair = pairs[i];

		if(String(pair).indexOf("=") != -1) {
			var key = pair.split("=")[0];
			var val = pair.split("=")[1];
			o[key] = val;
		}
	}

	return o;
}
We keep the data processing very simple in this case, by assigning 2 new values to the payload.
function processData(data) {

	data.Id = Platform.Function.GUID();
	data.CreatedDate = DateTime.SystemDateToLocalDate(Now());

	return data;
}
The result of this whole process will return a JSON object.
/// IF POST

var result = {
	status: request.Status,
	message: request.Results[0].StatusMessage,
	details: request
}

Write(Stringify(result));

/// IF GET

var result = {
	items: [
		{
			num: request.Results.length
		}
	]
}

Write(Stringify(result));
Full code
Please have a look at the full code. Feel free to add your own allowed origin in the beginning of the code.
<script runat='server'>

    Platform.Load('core', '1');

    var api = new Script.Util.WSProxy();

    var allowedOrigin = [
        "https://playground.amp.dev",
        "https://amp.gmail.dev",
        "https://mail.google.com",
        "https://user-content.s10.sfmc-content.com"
    ];

    var sender = Platform.Request.GetRequestHeader("AMP-Email-Sender");
    var origin = Platform.Request.GetRequestHeader("Origin");
	var referer = Platform.Request.GetRequestHeader("Referer");
    var source = Platform.Request.GetQueryStringParameter("__amp_source_origin");

    try {

        if(!!inArray(allowedOrigin, origin)) {
            HTTPHeader.SetValue("Access-Control-Allow-Methods", "POST");
            HTTPHeader.SetValue("Access-Control-Allow-Origin", origin);
            HTTPHeader.SetValue("Content-Type", "application/json");
            HTTPHeader.SetValue("Access-Control-Expose-Headers", "AMP-Access-Control-Allow-Source-Origin");
            HTTPHeader.SetValue("AMP-Access-Control-Allow-Source-Origin", source);
            HTTPHeader.SetValue("Access-Control-Allow-Credentials", "true");
        } else {
            throw "Origin not allowed";
        }

        if(Platform.Request.Method == "POST") {

            var form = parsePostJSON();

            form = processData(form);

            var request = api.createItem('DataExtensionObject', {
                Name: "Subscriptions",
                Properties: wsPack(form)
            });

            if(request.Status == "OK") {

                var result = {
                    status: request.Status,
                    message: request.Results[0].StatusMessage,
                    details: request
                }

                Write(Stringify(result));

            } else {
                throw request.Results[0].StatusMessage;
            }

        } else {

            var request = api.retrieve(
				"DataExtensionObject[Subscriptions]",
				["Id"],
				{
					Property: "EmailAddress",
					SimpleOperator: "isNotNull",
					Value: " "
            	}
			);

            if(request.Status == "OK") {

                var result = {
                    items: [
                        {
                            num: request.Results.length
                        }
                    ]
                }

                Write(Stringify(result));

            } else {
                throw "There was a problem retrieving from the Data Extension.";
            }

        }

    } catch(err) {

        Write(Stringify({
            status: "Error",
            message: err
        }));

    }

    function processData(data) {

        data.Id = Platform.Function.GUID();
        data.CreatedDate = DateTime.SystemDateToLocalDate(Now());

        return data;
    }

    function parsePostJSON() {

        var o = {};

        var post = String(Platform.Request.GetPostData());

        var pairs = post.split("&");

        for(var i in pairs) {
            var pair = pairs[i];
            if(String(pair).indexOf("=") != -1) {
                var key = pair.split("=")[0];
                var val = pair.split("=")[1];
                o[key] = val;
            }
        }

        return o;
    }

    function wsPack(o) {

        var arr = [];

        for (var k in o) {
            arr.push({
                Name: k,
                Value: o[k]
            });
        }

        return arr;
    }

    function inArray(arr, k) {

        var b = false;

        for (var i in arr) {
            if (arr[i] == k) b = true;
        }

        return b;
    }
</script>
Conclusion
This article doesn’t cover even a tiny bit of AMP for Email’s potential, but can hopefully get you started on the right path.
AMP for Email is considered to be the next step in email evolution. By implementing it today, we are driving the progress to a wonderful and outlook-less future.
Have I missed anything?
Please poke me with a sharp comment below or use the contact form.


Hi Ivan, I am stuck with using this code. When implementing this I get the records in a data extension but the columns EmailAddress & consent are empty. I followed the whole tutorial multiple times now but I can’t get it to work. SSJS is not my strongest side but I know what should happen with the different functions.
Do you have any tips to try to debug the code? I find it very hard to debug with no error messages. I tried adding an extra column to the data extension and just output different steps of the process. For example outputting: Stringify(wsPack(form));
Then I get the following:
{“——WebKitFormBoundaryYLjXBM05foOgEDzZ Content-Disposition: form-data; name”:”\”EmailAddress\”\r\n\r\ndennis@markable.email\r\n——WebKitFormBoundaryYLjXBM05foOgEDzZ\r\nContent-Disposition: form-data; name”,”Id”:”cb7a0981-2b53-4e34-a167-28b695eeddc3″,”CreatedDate”:”2021-05-05T11:59:35.479″,”testField”:”null”}
Hope you can help!
I was afraid it would happen to some users 🙁 Are you testing this email by sending it to from Marketing Cloud or you use AMP Playground or the Marketing Cloud email preview? Basically, parsePostJSON function doesn’t work properly, if you can’t solve it, just get each field value separately using Platform.Request.GetFormField() function.
I replicated but show me an error ‘Errors occured. Please try again later’
but works, why?.
How can I include a hidden variable like Id through email?
Thanks your post!
Hello,
Thank you for this tuto. I used to implement this example amp-gmail-dev-playground test tool but the script is not allowed. after research, I found that we should add amp-script tag to use cutomm scripts, however this tag not supported by AMP-email (link find attached). How do you do to use the custom script ?
Thank you
Hi! Custom script will not work. But I might get some idea why it’s not working for you: parsePostJSON(“foo”) function will probably fail if you are testing from the Playground. Try retrieving the AMP email form fields on by one using Request.GetFormField(“bar”);
Hi Ivan,
In the Form Handler code you refference the Data Extension by it’s name but there’s no path. How does it connect to the DE without a path? Is the name alone enough?
Great tutorial btw.
Thanks!
Hi Rodrigo,
You just need a Name or a CustomerKey to connect to a Data Extension.
No path needed anywhere in SFMC
Perfect! Thank you
Hello
I am trying to use this code first, just to read and understand every piece. I am having some issues when trying to publish the landing page. First I am trying only this part of code:
Platform.Load(‘core’, ‘1’);
var api = new Script.Util.WSProxy();
. It gives an error , when trying to publish it. I publish it anyway and then in the console log it display error 400 (Bad Request). When I add the part of code for the allowed origin, it throws the exception “origin not allowed”.
I am completely stuck in this part. Any idea on how can I solve this?
Thank you,
Hi Leny. I have no idea, but… what I would do in your situation is start building it from scratch one step at a time. 400 Bad Request means usually something is wrong with your URL.
This is really cool – thank you so much for putting this together!
I’m having trouble with passing through null values from the form submission, even for non-required fields. Is there something additional that needs to be put in place here to handle this?
function parsePostJSON() {
var o = {};
var post = String(Platform.Request.GetPostData());
var pairs = post.split(“&”);
for(var i in pairs) {
var pair = pairs[i];
if(String(pair).indexOf(“=”) != -1) {
var key = pair.split(“=”)[0];
var val = pair.split(“=”)[1];
o[key] = val;
}
}
return o;
}
Is this the line that’s causing the issue because there is no content before the = sign?
var key = pair.split(“=”)[0];
Thank you!
I have no clue. I remember that when you pass an empty value, the way the form is sent is different, so I try not to send anything empty 😀
Out of the blue, this has stopped working for me recently, but only with certain origins. The AMP playground is still working, but Gmail environments are returning an error state.
Has something changed here?
Hi, Ivan, thank you for this amazing code… I actually used it for a contact form which worked for a bit, but it doesn’t anymore. It can retrieve and show the info of how many people are suscribed through the amp-list but it cannot write on the same data extension; it shows the message “Errors occured. Please try again later”. It’s really weird. Do you have any idea on why this could be happening?
I also have a question about the CORS version that you are using on this code, isn’t it version 1, right? Shouldn’t you be using the SSJS code shown here in the documentation: https://amp.dev/documentation/guides-and-tutorials/learn/cors-in-email/?format=email#ssjs
Thanks a lot in advance for your answer and keep up the good work!!!
Hi guys, it seems that multiple people have a problem at this moment. You’ll need to debug it 🙁 What do you see in the Console? What does the XHR request return? Have you tried if it works from the Preview of the email?
The error I’m seeing is to do with a missing header request (Access-Control-Allow-Origin). Since I am still able to run the form and add records to a data extension from the AMP playground but not in Gmail Dev or Gmail inbox environments, it looks like something has changed with the origin that is passed through from the XHR request from Gmail. Will keep digging to see if I can find anything.
You need to debut it, I would analyse everything that is sent from Gmail (headers, payload, …)